Powering a Referral Program using Zapier & Hubspot
This guide will walkthrough the steps required to set up a referral program using Hubspot through our integration with Zapier.
By the end of this guide, you will have set up a connection between Hubspot and SaaSquatch using Zapier to transfer data between them. The structure of this example will pull in and store the referrer's referral code from the landing page and will issue when the contact's Lifecycle Stage in Hubspot has been set to "Customer" automatically by Hubspot.
Note: Depending your Zapier plan, it could take up to 15 minutes for new users to make their way from Hubspot through Zapier into SaaSquatch.
🔗 Zap 1: Send Referred User to SaaSquatch
🔗 Retrieving the Referral Code
As the new user hits your designated landing page, use squatch.js to retrieve the referral code.
Save the referral code as a custom property for the new contact in Hubspot. We recommend "Referred By Code" to prevent confusion.
🔗 Setting up the Trigger
Create a new Zap in Zapier using Hubspot's "Contact Recently Created or Updated" as the trigger. Click Continue.
Select your Hubspot account from the drop-down menu and click Continue.
From the "Additional Properties To Retrieve" drop-down menu, select "Contact Information: Referred By Code" (or whatever you've titled the property from Step 2) and click Continue.
Click Test Trigger and verify that information is flowing into Zapier from Hubspot correctly.
Click Continue to save the Trigger settings.
🔗 Setting up the Action
Selecting "SaaSquatch" as the App, choose "Create User" as the "Action Event". Click Continue.
Select your SaaSquatch account from the drop-down menu and click Continue.
From the "Select A Tenant" drop-down menu, select your Test or Live tenant depending on if your testing this Zap out or setting it up for production.
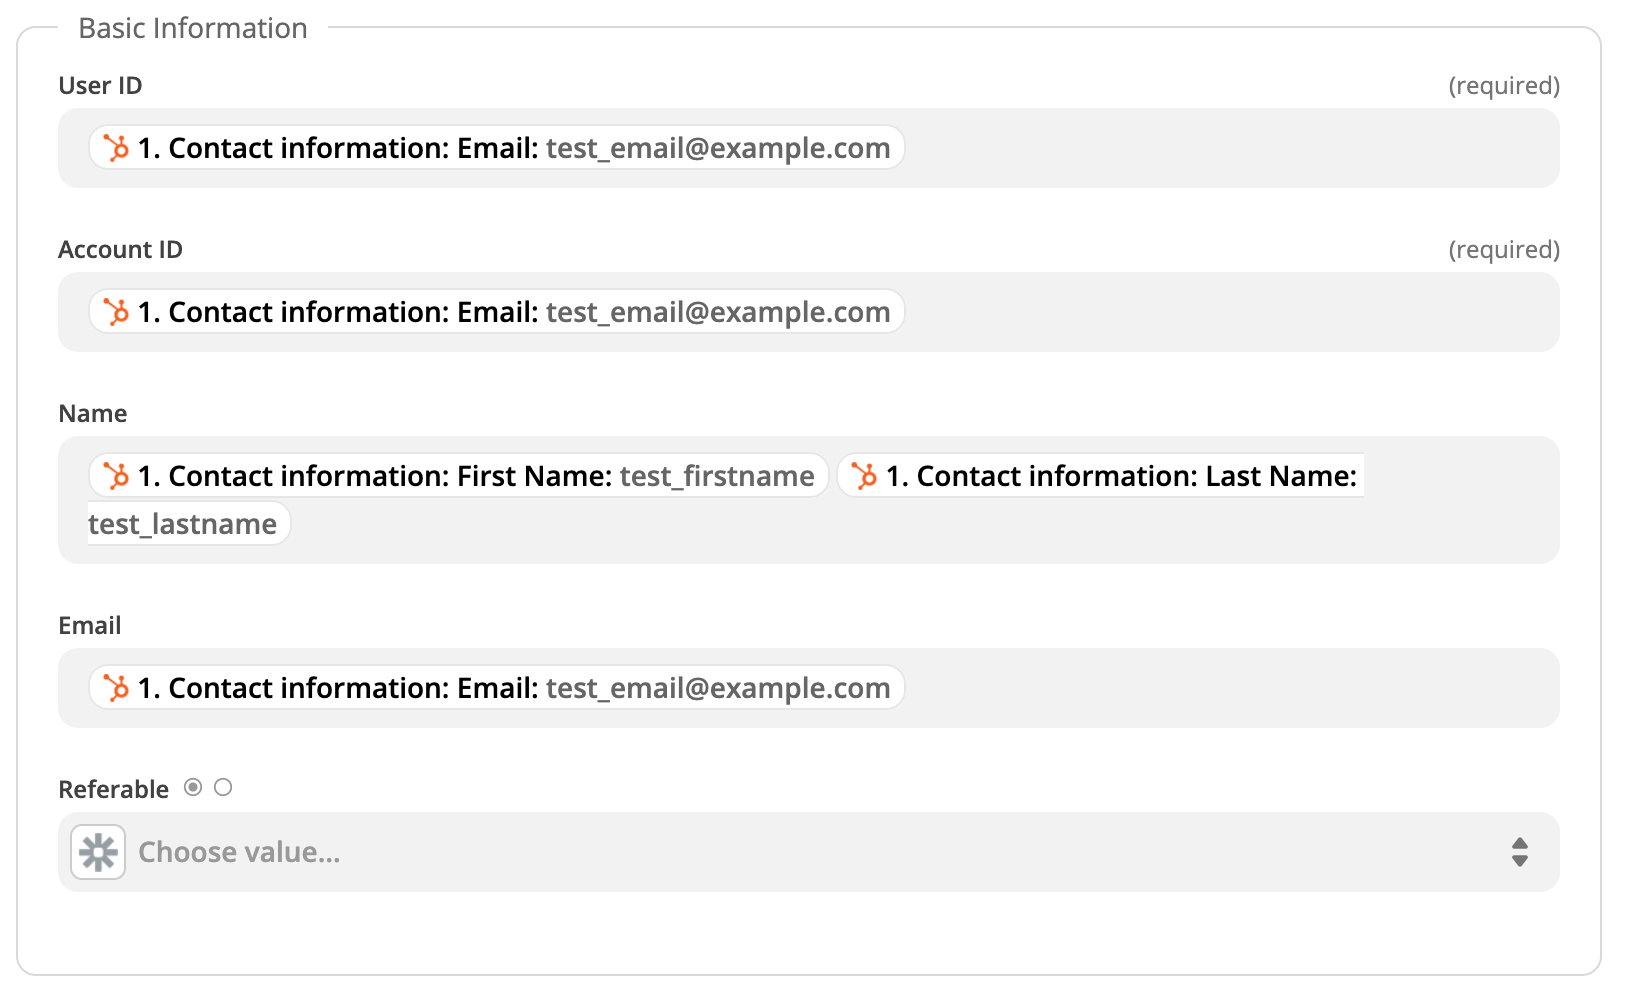
In the "Basic Information" section, fill in the User ID and Account ID with the approporiate variables from Hubspot. For simplicity's sake, we recommend using the Contact's email address for both.
Add the First Name and Last Name variables from Hubspot into the "Name" field and Email into Email.
Leave the "Referable" field blank.
From the "Enable Advanced Mode?" drop-down menu, select "True" and scroll down to the "Referred By Codes" field once it loads.
Enter the "Referred By Code" propery from Hubspot into the "Referred By Codes" field.

Scroll down and click Continue.
Verify all of the information is correct and click the Test & Continue button.
If everything looks good click the Turn on Zap.
Test the flow by signing up a new user in your landing page and checking in the Participants tab of the SaaSquatch portal to ensure the the user makes it through.
🔗 Zap 2: Send "Customer" Event to SaaSquatch
🔗 Setting up the Trigger
Create a new Zap in Zapier using Hubspot's "New Contact Property Change" as the trigger. Click Continue.
Select your Hubspot account from the drop-down menu and click Continue.
Under the "Property Name" drop-down menu, select "Contact Information: Lifecycle Stage".
From the "Additional Properties To Retrieve" drop-down menu, select "Contact Information: Referred By Code" (or whatever you've titled the property from Step 2) and click Continue.
Click Test Trigger and verify that information is flowing into Zapier from Hubspot correctly.
Click Continue to save the Trigger settings.
🔗 Setting up the Action
Selecting "SaaSquatch" as the App, choose "Create Event" as the "Action Event". Click Continue.
Select your SaaSquatch account from the drop-down menu and click Continue.
From the "Select A Tenant" drop-down menu, select your Test or Live tenant depending on if your testing this Zap out or setting it up for production.
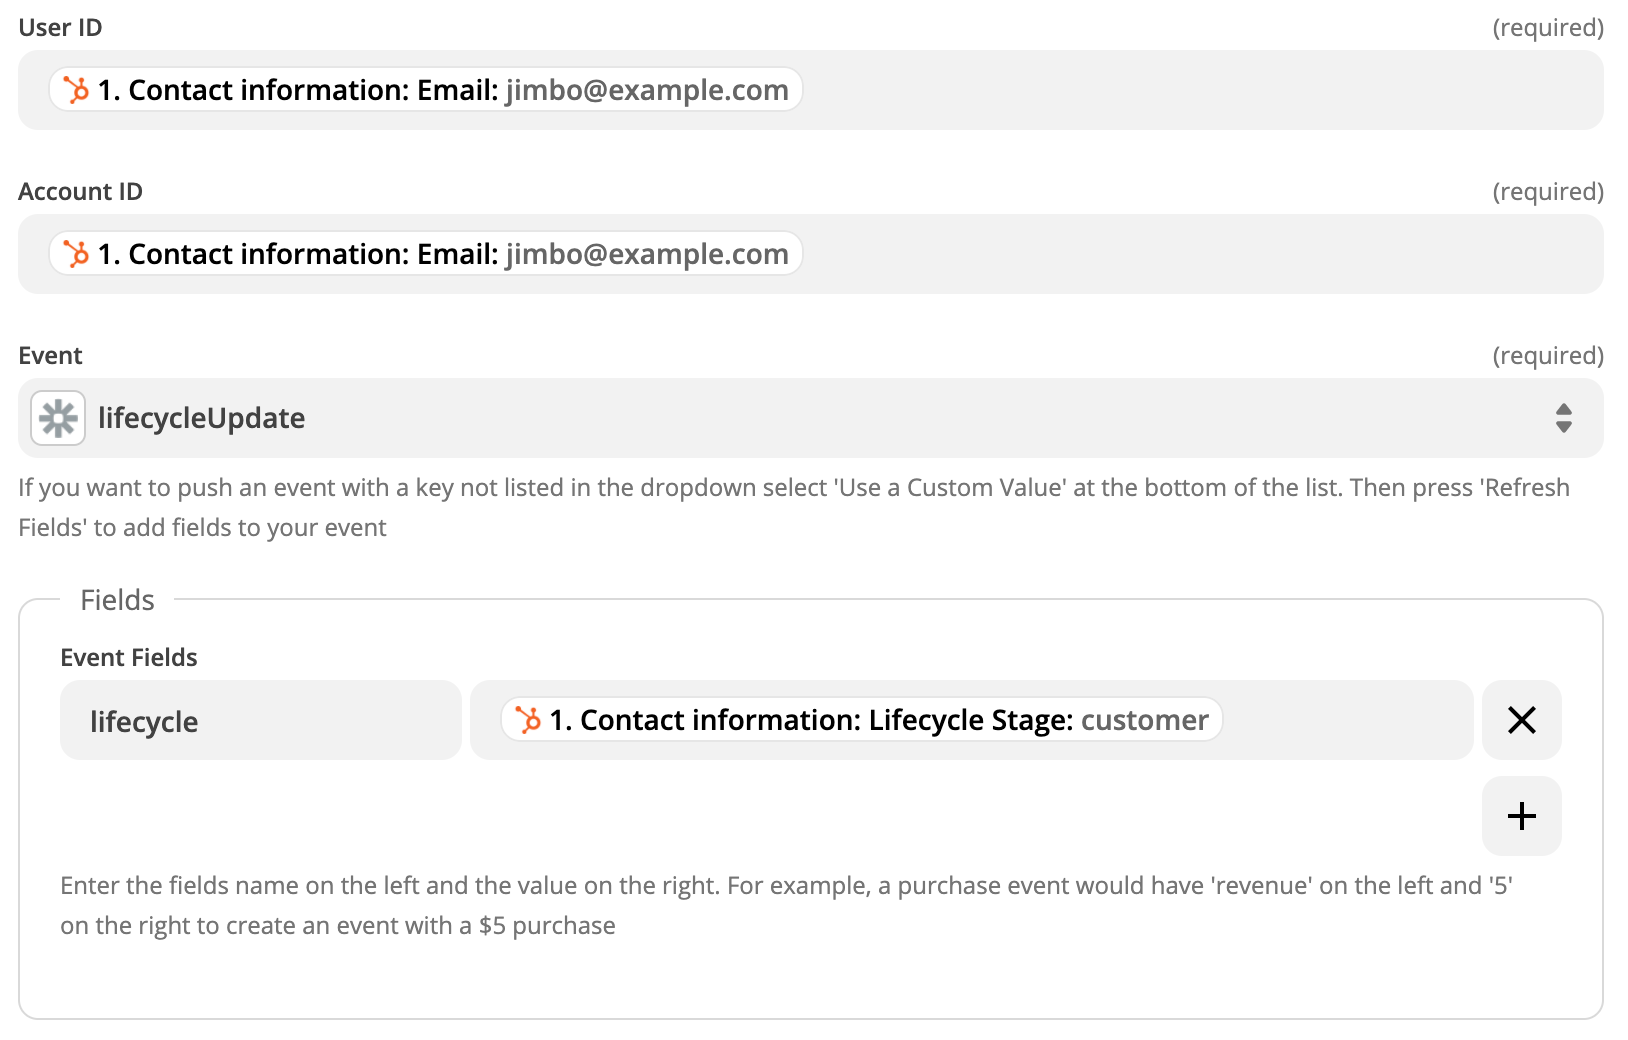
Next, fill in the User ID and Account ID with the approporiate variables from Hubspot. For simplicity's sake, we recommend using the Contact's email address for both.
For the "Event" field, manually type in
lifecycleUpdateto match the event key SaaSquatch will be listening for.In the "Fields" section, enter
lifecyclefor "Event Fields" and choose "Contact information: Lifecycle Stage" for the right-hand field (see below).
Scroll down and click Continue.
Verify all of the information is correct and click the Test & Continue button.
If everything looks good click the Turn on Zap.
Test the flow by completing a deal linked to a Contact that has previously been sent to SaaSquatch and then verify in the Participants tab of the SaaSquatch portal that the event has been added for the user.
Note: To use a different deal stage aside from "Closed Won", you will need to set up a Hubspot Automation to ensure that when the Deal reaches the correct stage, the Contact's Lifecycle Stage is updated as well. Furthermore, you will need to configure your program logic in SaaSquatch to listen for that stage.