Zapier Integration Install Guide
SaaSquatch’s integration with Zapier will allow you to build Zaps around different actions in your Growth Automation Programs as well as use Zaps to trigger actions in your SaaSquatch programs, such as creating users and rewards, or triggering events.

🔗 Using SaaSquatch as a Trigger for Zaps
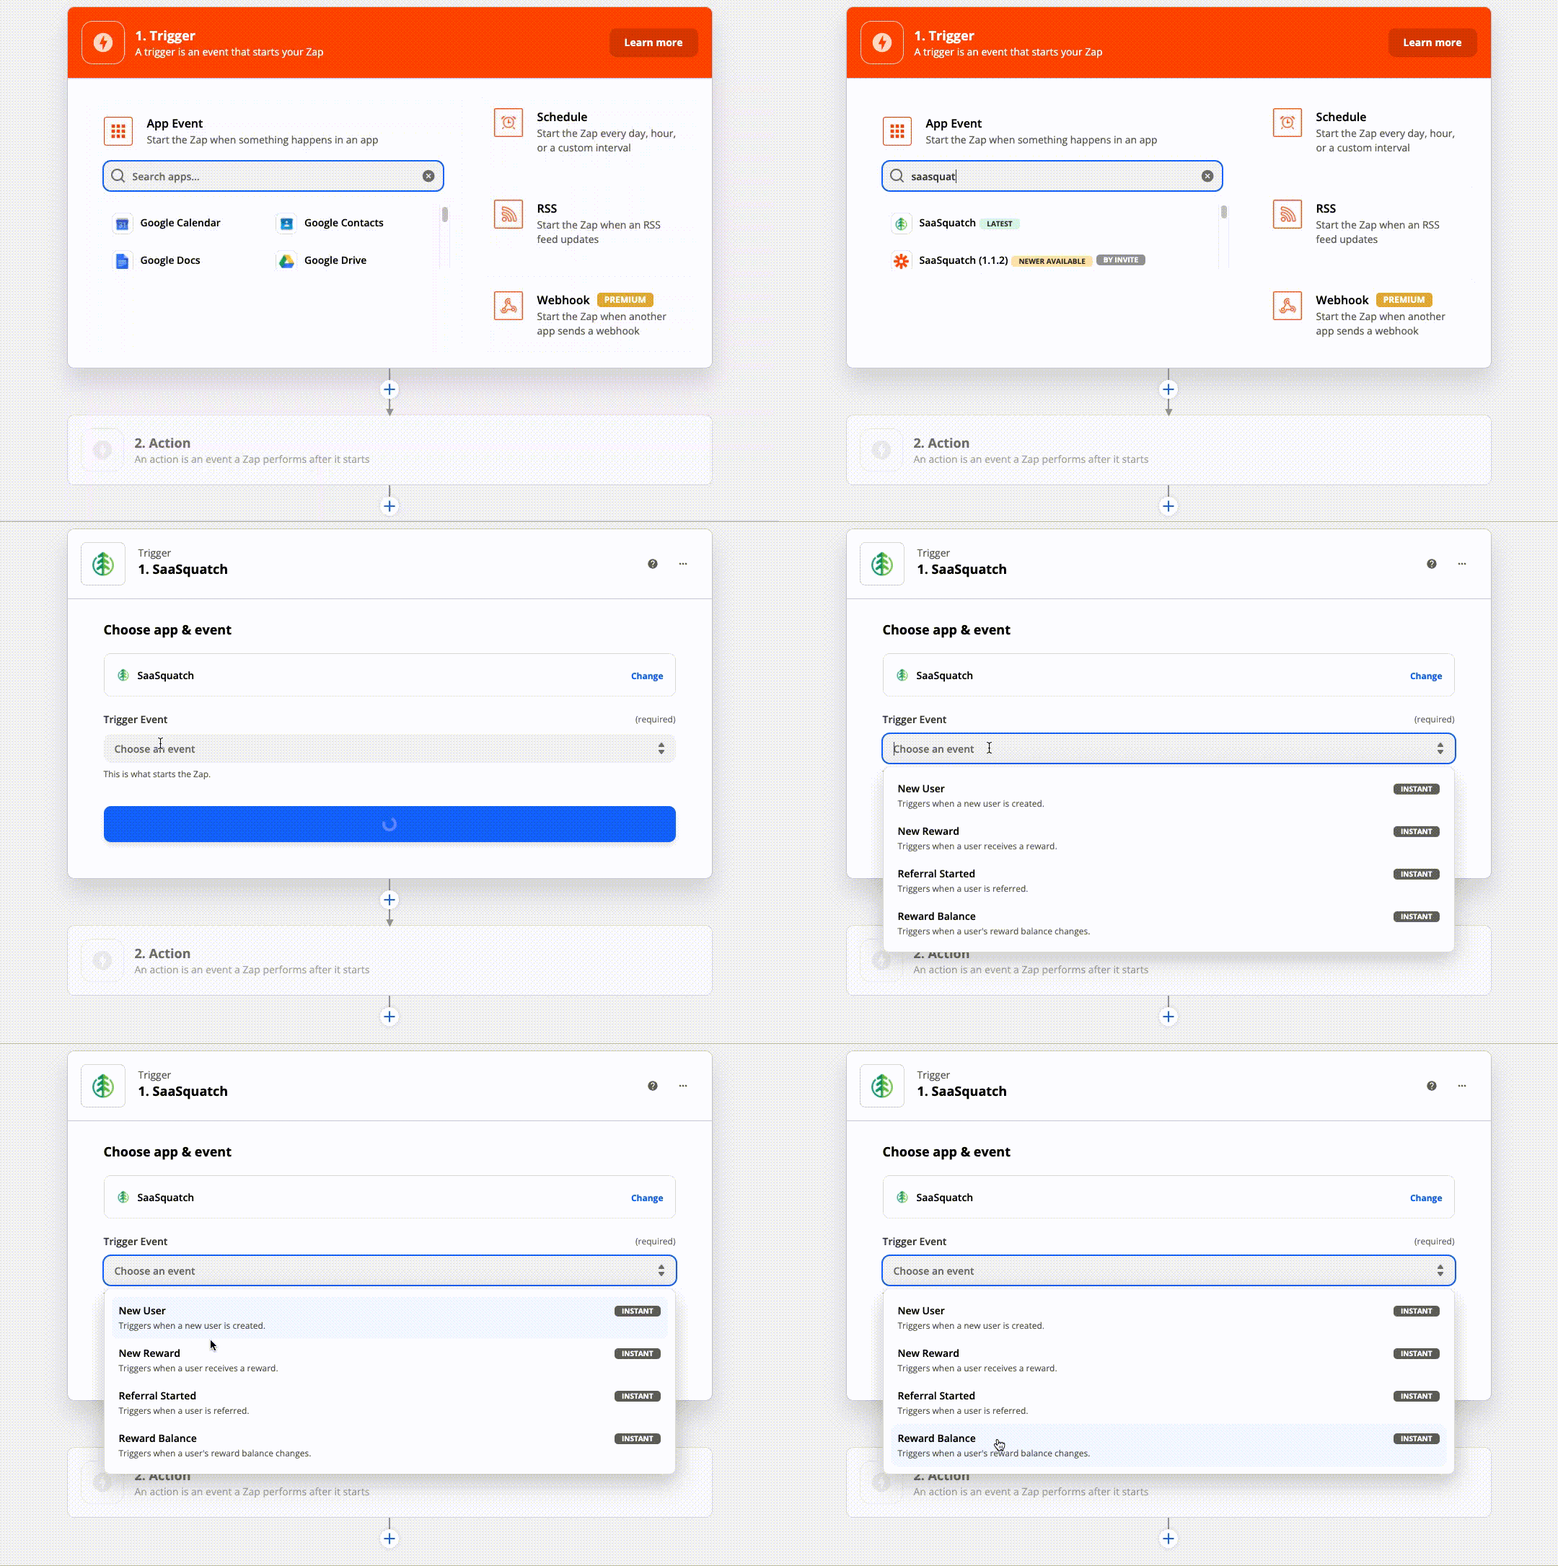
You can configure Zaps to trigger when the following events occur in your SaaSquatch tenant:
- New User Triggers when a new user is created.
- New Reward Triggers when a user receives a reward.
- Referral Started Triggers when a user is referred.
- Reward Balance Triggers when a user's reward balance changes.

🔗 To create a Zap using SaaSquatch as a trigger:
- Login to your Zapier account and click on the “Create Zap” button.
- Search for and select “SaaSquatch” from the “App Event” section.
- Choose the type of event that you would like to trigger your Zap from the dropdown menu. Click “Continue”.
- Under “Choose Account” you will be prompted to sign in to SaaSquatch. If you already have a connection to SaaSquatch you can select that instead of signing in. Click “Continue”.
- Note: Make sure a Zapier administrator account links to SaaSquatch to ensure that your changes go through.
- Next you will need to select a tenant. You should see at least two listed: Test and Live. We highly recommend you build your Zap in your Test tenant first. Once you have confirmed it is working as intended, then switch it to Live. Click “Continue”.
- If you want to review the data that Zapier pulls from SaaSquatch, click the “Test & Review” button. Otherwise, if you want to proceed with making the Zap, you can click “Test & Continue”.
- Finish setting up your Zap by creating the actions it will perform when the trigger is activated.
🔗 Using Zapier to perform actions in SaaSquatch
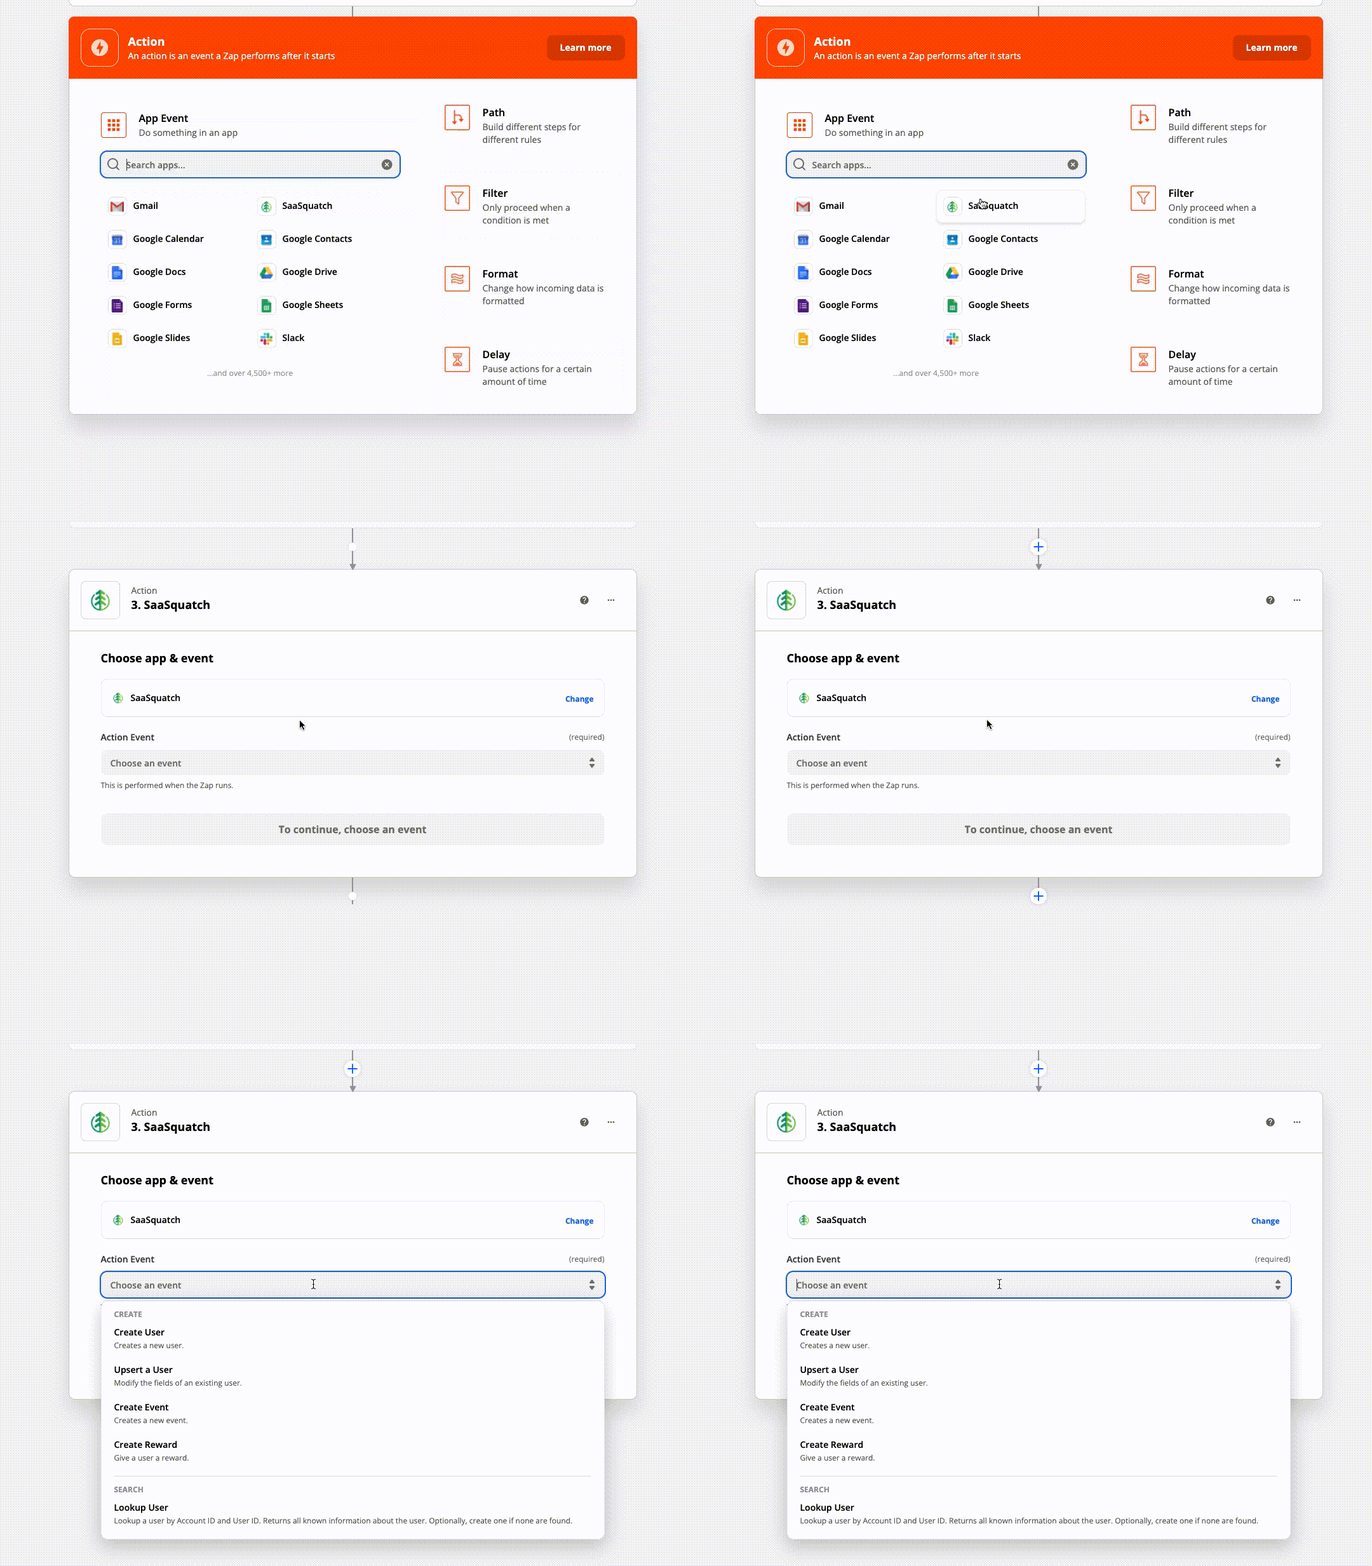
You can also use Zaps from Zapier to perform the following actions in your SaaSquatch tenant using data pulled from previous step(s):
- Create User Creates a new user.
- Upsert User Modifies the fields of an existing user, or creates a user if the specified user does not exist.
- Create Event Creates a new user event.
- Create Reward Creates a reward for a user.
- Lookup User Lookup a user by Account ID and User ID. Returns all known information about the user. Optionally, create a new user if one isn’t found.

🔗 To create a Zap that performs an action in SaaSquatch:
- Login to your Zapier account and click on the “Create Zap” button.
- Configure the first step(s) of your Zap.
- Create an Action step and search for and select “SaaSquatch” from the “App Event” section.
- Choose the type of action event that you would like to perform from the dropdown menu. Click “Continue”.
- Under “Choose Account” you will be prompted to sign in to SaaSquatch. If you already have a connection to SaaSquatch you can select that connection instead of signing in. Click “Continue”.
- Next you will need to select a tenant. You should see at least two listed: Test and Live. We highly recommend you build your Zap in your Test tenant first. Once you have confirmed it is working as intended, then switch it to Live. Click “Continue”.
- You are then prompted to populate fields for the action event that you have chosen. You can choose to use static data or data collected from previous steps in your app.
Note: you may need to click on the “Refresh Fields” button to get the specific fields based on what you have selected.
- Once you have set up the fields, proceed with testing the event.
Note: Performing tests will make real API calls to your SaaSquatch tenant, this can cause your tenant to be polluted with test data. It is recommended that Zaps be tested carefully on your test tenant.
- When you are ready to go live, turn on your Zap!
🔗 Connecting SaaSquatch with Zapier
To connect SaaSquatch with Zapier, you will need to authenticate your SaaSquatch account from within Zapier. Zapier will prompt you to do so when you use SaaSquatch as a Trigger or Action.
Note: This is the same information you use to log into the SaaSquatch Portal to see your programs and program settings.
To manage your connections from within Zapier, login to your Zapier account and select the ‘My Apps’ page from the side bar. From there you are able to add and remove connections to the SaaSquatch platform.
🔗 Zap History
You can review all the actions a Zap has performed by navigating to the “Zap History” page, or by clicking the “History” option from Zap itself. This is a great page for troubleshooting and reviewing your Zaps to ensure everything is functioning as designed.
For every task performed, Zapier will record the response received from SaaSquatch on the Zap History page.
You should regularly check your “Zap History” page on Zapier. Any error messages sent from SaaSquatch to Zapier will be stored here. If you notice an event wasn’t completed in SaaSquatch, you should isolate and review the associated task in your Zap History. There you will find any messages from SaaSquatch that may explain why the task didn’t complete.
🔗 Some Zap Ideas
🔗 SaaSquatch as a Trigger:
- Send a Slack message to your internal team every time a referral converts.
- Create a new spreadsheet row in a Google Sheets doc for each new referral that comes in
- Set up Mailchimp to send out an email to a new referral participant using that user’s share links and/or referral codes
- Use Typeform to automatically send out a survey link to participants after they receive a reward.
- Setup automated reward fulfillment in PayPal or Stripe.
- Attributing Referrals using a CRM like Hubspot or Zoho.
🔗 SaaSquatch as an Action:
- Pull in order details from Shopify or Square and send out purchase events to SaaSquatch.
- Pass through user upserts, events and custom fields from your CRM like Hubspot or Zoho.
- Attributing Referrals in SaaSquatch from a CRM
- Referral conversion or reward triggering based on events from another platform