Setting Up Reward Exchange Options
Empower participants in your Loyalty program to exchange rewards they’ve earned for something they’ll really love. With our self-serve Reward Exchange feature, you can set up customized reward exchange options for your participants to pick from.
🔗 Overview
Reward Exchange is a feature that empowers your participants to exchange reward units they’ve earned for different rewards or other reward units, such as exchanging Points for a gift card. To use Reward Exchange for your program, you can set up one or several reward exchange options and choose the rules around:
- What reward units your participants can exchange
- What they can get in return
- Who can see and use the exchange option
Full Access and Program Manager team members can create a reward exchange option and set its rules.
🔗 1. Create the reward exchange option
- Sign in to the SaaSquatch Admin Portal.
- Go to the Rewards page.
- Click the Exchange tab.
- Click the orange Create exchange option button.
- Enter a name for the reward exchange option.
Next, set up your reward exchange rules.
🔗 2. Set the exchange rules
For more information about the types of fixed and variable exchanges you can set up, see our doc on Reward Exchange.
- Use the From dropdown list to choose the reward unit that participants can exchange.
- Use the To dropdown list to choose the reward or reward unit that participants will receive.
- Tip: You can create new reward units or rewards within the dropdown list.
- Set either the Cost or the Exchange Rate and Increments in the lowest denomination of the reward unit, e.g., cents if your reward unit is dollars.
| If exchanging one reward unit for... | Then |
|---|---|
|
Note: If you chose A set of rewards, then you'll need to assign a cost for each reward. Click Add fixed reward option to give your participants more choices. |
|
|
🔗 3. Set the availability rules
The Availability section allows you to set optional rules around who can see this reward exchange option and when they can use it.
🔗 Showing or hiding the exchange option
By default, this exchange option is shown to all participants. In some situations, you may want to hide a particular exchange option—for example, if you only want to show US participants an exchange that lets them turn in their Points for US Dollars.
The steps below are optional.
- Using the Country dropdown list, select the countries you want the exchange option to be available in.
- Note: This checks if participants have a
countryCodefield on their profile that matches with the countries you selected. If you would rather exclude countries, then you'll need to set additional filters with a JSONata expression.
- Note: This checks if participants have a
- Set other criteria for showing or hiding the exchange option.
- Click Add rule.
- Use the dropdown lists to set conditions based on participants' default, custom or calculated fields.
- Click Switch to Advanced if you want to enter an expression using JSONata.
🔗 Enabling or disabling the exchange option
By default, this exchange option is enabled for all participants who have an available balance to exchange. You can add rules that enable the exchange option only for participants who meet specific criteria, like belonging to a Gold segment.
The steps below are optional.
- Click Add Rule.
- Use the dropdown menus to set conditions based on participants' default, custom or calculated fields.
- Click Switch to Advanced if you want to enter an expression using JSONata.
🔗 4. Choose display options
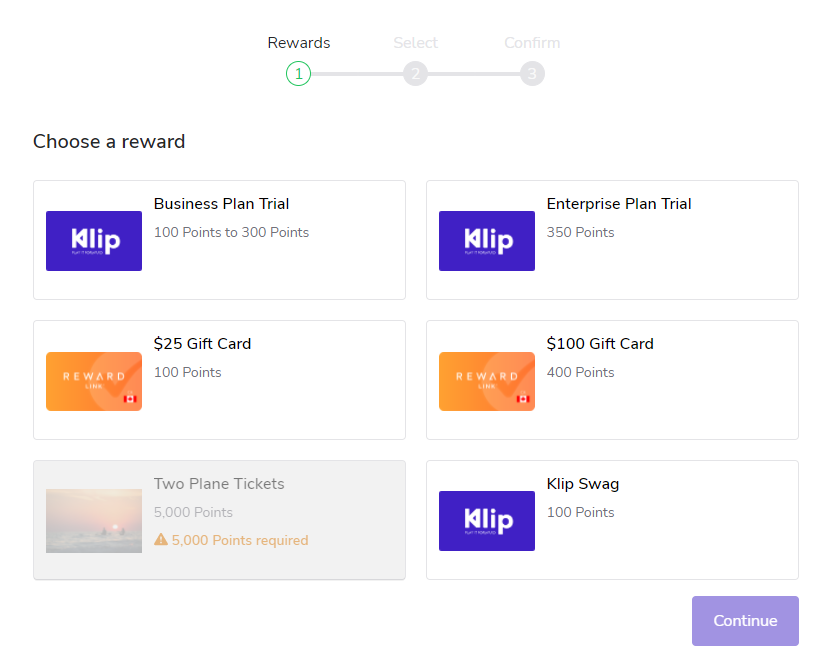
If you don’t modify the display settings, then participants will see the default gift image along with the cost of the reward. The exchange options will be shown in the order they were created, from oldest to newest.
- Enter the name you want to be displayed to your participants.
- Set the display order.
- Note: To override the default display order, enter a number in this box.
1is the highest priority and will be shown first.
- Note: To override the default display order, enter a number in this box.
- Enter a one- or two-sentence description.
- Choose an image to represent the exchange option by either:
- Uploading an image from your computer
- Pasting a URL
Next, review your choices and save the reward exchange option.
🔗 5. Review and save
In the final section of the setup flow, you will see a summary of your selections.
- Confirm that the exchange rules and eligibility criteria are accurate.
- Click the orange Save button.
Next, add the Reward Exchange component to your widget or microsite so that participants can see and use your exchange option.
🔗 6. Add the Reward Exchange component to your widget or microsite
Before you begin: Reward Exchange is only compatible with verified access widgets or microsites that have our mint components package installed. For help adding the mint components package or checking if you have it installed, see our document on participant experiences.
- Go to the Content page.
- Open the widget editor by clicking Edit widgets or the microsite editor by clicking Edit content.
- Follow our guide on customizing program widgets or microsite layouts and pages if you need help adding a new component.
- Note: The Reward Exchange component is available under the Rewards category.
- Save your changes.